
String lights are no longer strictly for Christmas front yards. They’re very popular for both indoor and outdoor decor. You can hang them as an outside ceiling for an alternate starry night or you can drape them inside for a chic look. And the possibilities are endless to how you can use these lights. The best part — you can achieve most of these projects while you’re on a budget.
Some of the ideas below are for special occasions and others can be used all year round. Take a look at some of the projects to help get you started with whatever string lights you may already have laying around (or inspire you to buy new lights).
If you have a canopy surrounding your bed, try draping string lights down along the sheer curtains.

Create transparent lanterns out of twine to put the string lights inside of.
Create the shape first out of water balloons and then glue twine to the balloons to make the lanterns.

For all the globe trotters, use the lights to pinpoint all the cities you’ve been to on a map.
Attach the string lights to the back of the map.

Who says string lights have to be limited to only draping shapes, use the lights to spell out any message you want.

Stuff a jar with battery powered lights to make your very own DIY firefly lights.

Or you can try stuffing them into decorative looking terrariums.

For a nautical themed room, mix the string lights with rope.

If you want a light way of dividing a room up, try hanging up lights as your alternative wall.

In substitution of a table side lamp, drape string lights over a night stand instead.

If you have the bottom of a shared bunk bed, decorate your small yet cozy space by draping string lights around the bottom of the top bed.

Zig zag string lights down a hallway to create a spotlight DIY.

And when Christmas time finally does come around, try opting out an actual tree for the string lights shaped as a tree on the wall.
Intertwine string lights with a garland made out of origami boxes to recreate this look.

Hang pictures on the string lights to create an enchanting photo wall.

Create a net out of the lights.

Make pendants with holes poked in to create letters that’ll create a message when put over the lights.

Replace the stuffing inside an old stuffed animal with string lights to create a cute new night light.

Bonus. How to Turn A Mini Blind Elegant
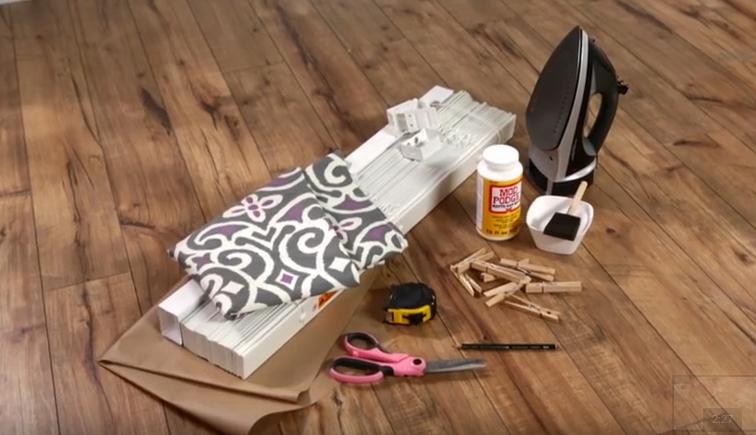
Breathe New Life Into Your Blinds
What if you could upcycle your tired old mini blinds into something beautiful, decorative and vibrant? All you’ll need are a few craft store supplies. No sewing required! You’ll need a thick upholstery fabric of your choosing, mini blinds, Mod Podge, a foam brush, clothes pins, a tape measure and an iron.

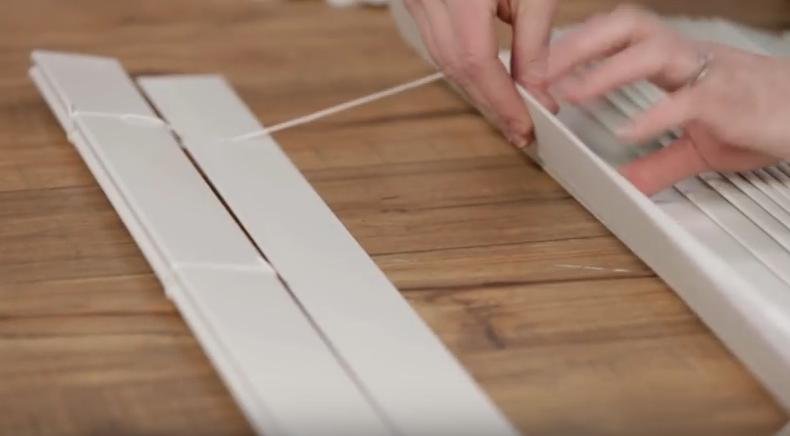
Measure Up
First, you’ll want to measure the vertical length of your blinds and write it down, then lay the blinds out on your work space and clip the inside ladder strings. Be careful not to cut the outer strings, as those are the ones that make the lift and lower mechanism work on your blinds.
Do The Division
Your mini blind’s slats will need to be seven inches apart, so odds are you’ll have way more slats than you need to complete this craft. Take your length measurement and divide it by seven. The resulting number will tell you how many slats you need to keep in tact.

And Get Snapping
After you’ve decided how many slats you’ll need, snap off the extras, being careful to maintain the structural integrity of the string that’s in place.
Then Lay Out Your Fabric
With the unprinted side facing up, place your fabric face down and set the blinds on top. Flatten out all of the slats and lay them about seven inches apart.

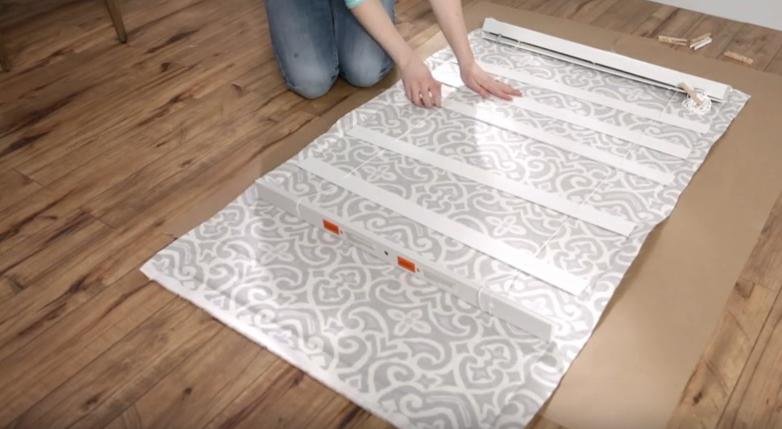
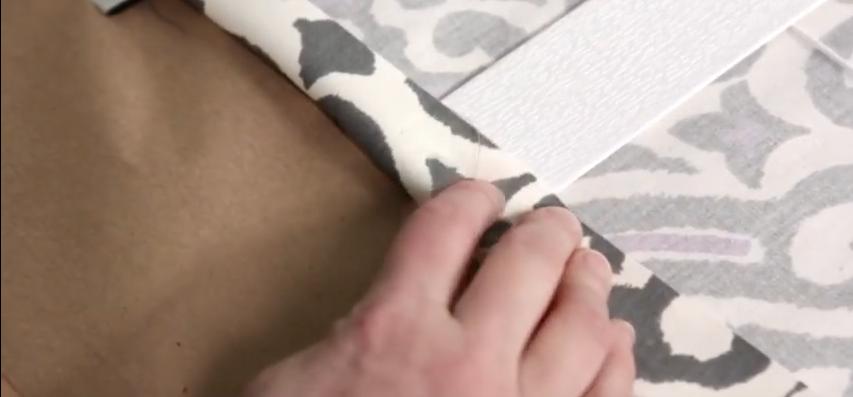
Iron It Out
The fabric should extend beyond the slats about 2 inches. After it’s cut, iron the edges to form a straight and clean hem, with the ends ironed over the slats.

And Make Your Cuts
The fabric on the top and bottom should also extend out about two inches. Once measured, make your cuts.
Now It’s Time To Get Down To Business
To create the most professional-looking roman shade, you’ll need to pop out the stopper at the end of the top of the blinds like so.
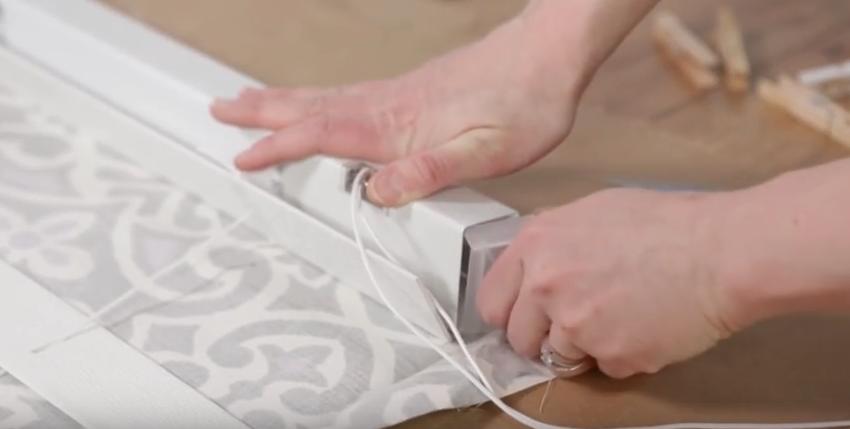

Then Make A Notch In The Fabric
Cut a small section above the top of the blind and up to your 2 inch fold. This is to make the fabric wrap perfectly around the top of the blinds without folding or bunching the fabric.

Glue Away!
Adding Mod Podge to both the notched fabric and blinds, adhere them together by wrapping the fabric around blinds, using a clothespin to keep it in place while it dries. Follow the same process for the opposite side.
Then The Slats
Focusing on the slats, add Mod Podge to the fabric and both sides of each slat. Press together and stick a clothes pin to keep it in place. Repeat for both sides of all of the slats.
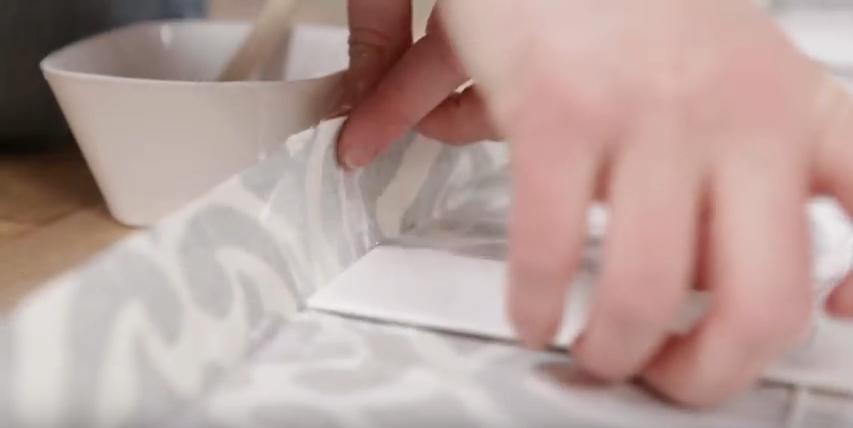

Then The Bottom
Fold the fabric over a bit to create a clean edge, then glue into place on the bottom bar and secure with clothespins.


Let Dry And Hang!
Touch the glued edges to make sure they’re dry. If so, you’re ready to hang you new Roman shade!
See It Live
To see the entire step by step process watch the following video:
Inexpensive Elegance
This pretty, upscale look can be achieved on-the-cheap with little work, and no one will be able to tell you once had to deal with those pesky mini blinds.